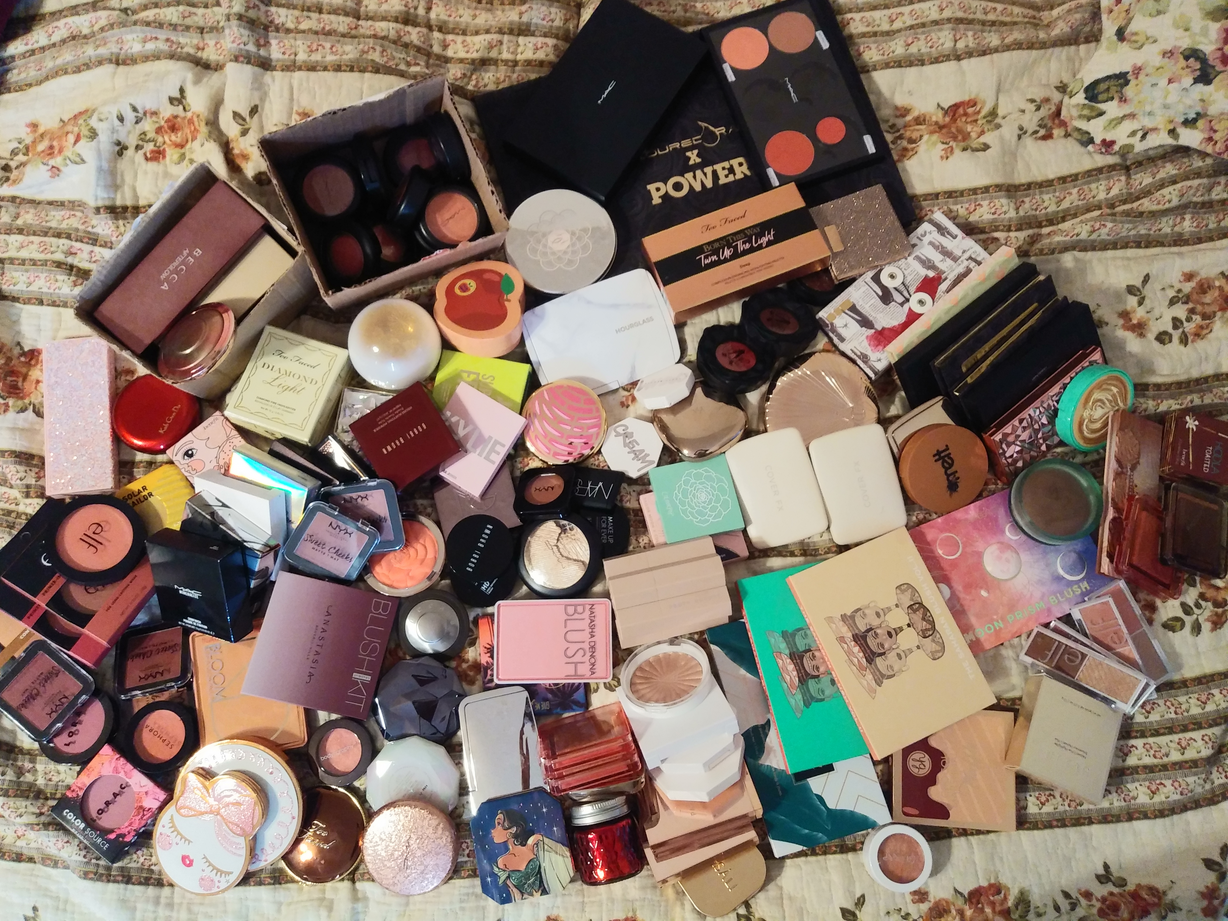
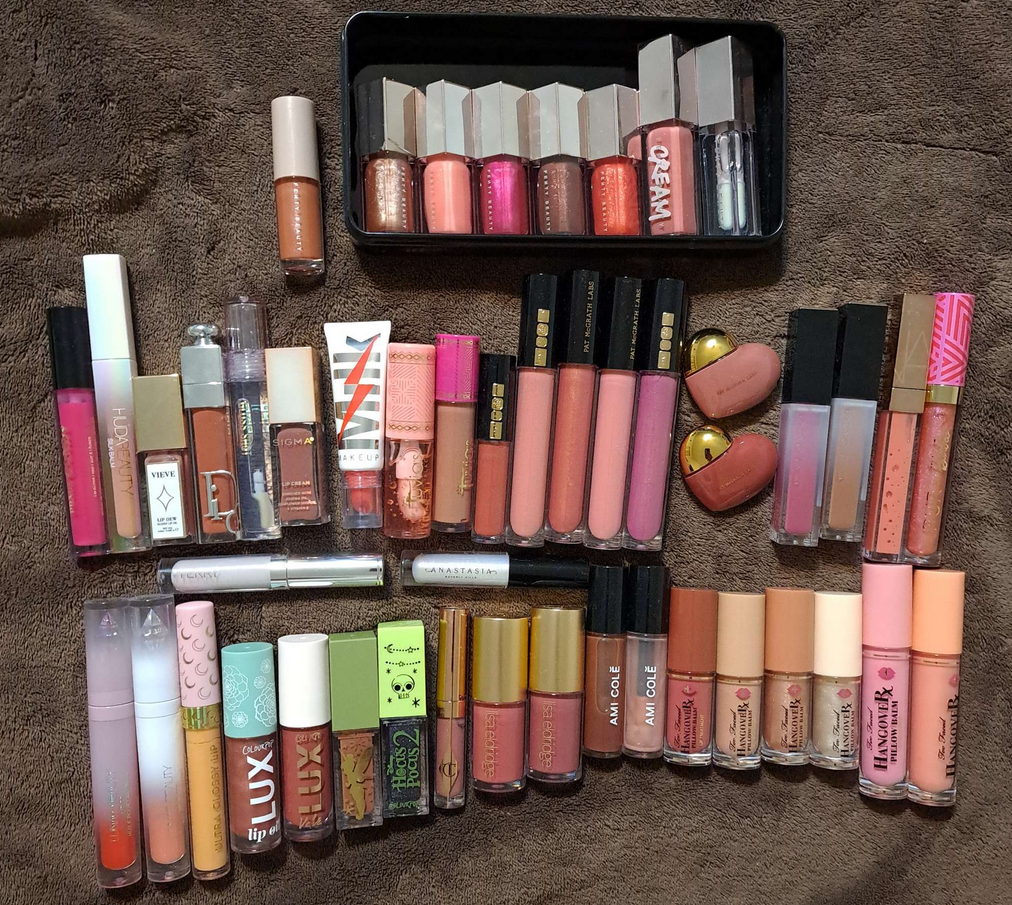
The photo above shows all the lip products I purchased or was gifted in 2023. I was systematically trying to review everything new that year, but ran out of time once I got engaged. Since I was moving overseas, I suddenly had to do a declutter and decide which items I would be bringing with me, whether I completed reviews for them or not.
Then, in 2024, I was trying to balance between reviewing newer and older items. It got overwhelming trying to juggle reviewing 25 lippies in a single declutter style post. My collection was getting out of hand again, so I decided to go on a low-buy. I switched gears and started focusing on posting smaller batches of lip reviews.
For today, I will finish reviewing the remaining interesting lip products from 2023, in addition to describing the process of how I whittled down my collection. At the end, I’ll show what my current collection in 2025 looks like and explain which items wouldn’t make the cut if I had to do another declutter.
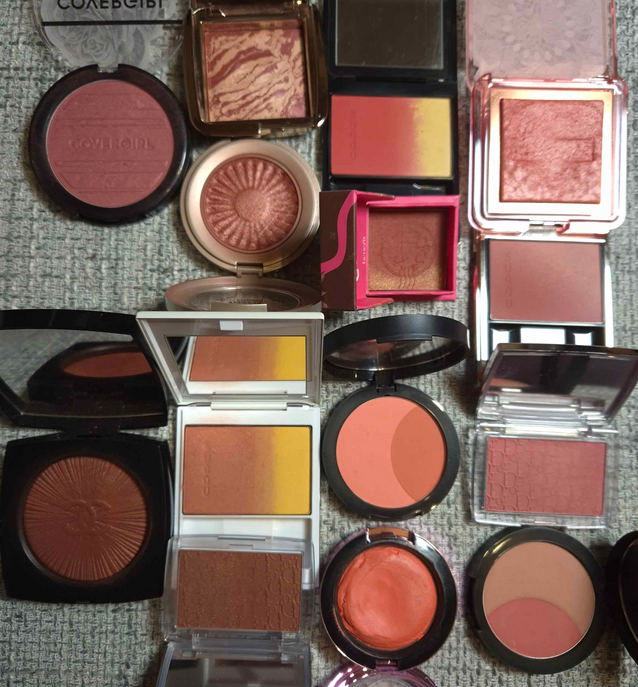
Bullet Lipsticks
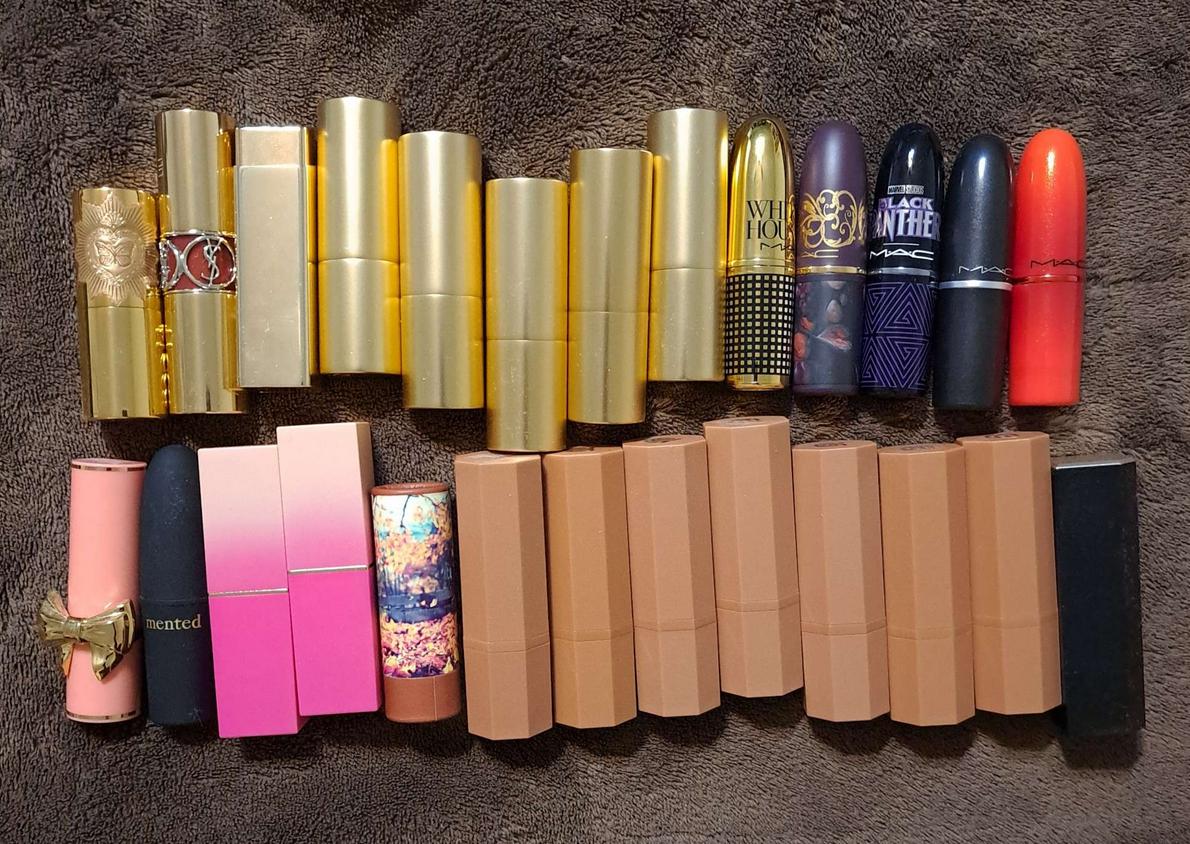
Top Row (L to R): Melt, YSL, Hourglass, Lisa Eldridge, and MAC.
Bottom Row (L to R): Pat Mcgrath, Mented, Juvia’s Place, Sephora, Propa Beauty, and Suqqu.
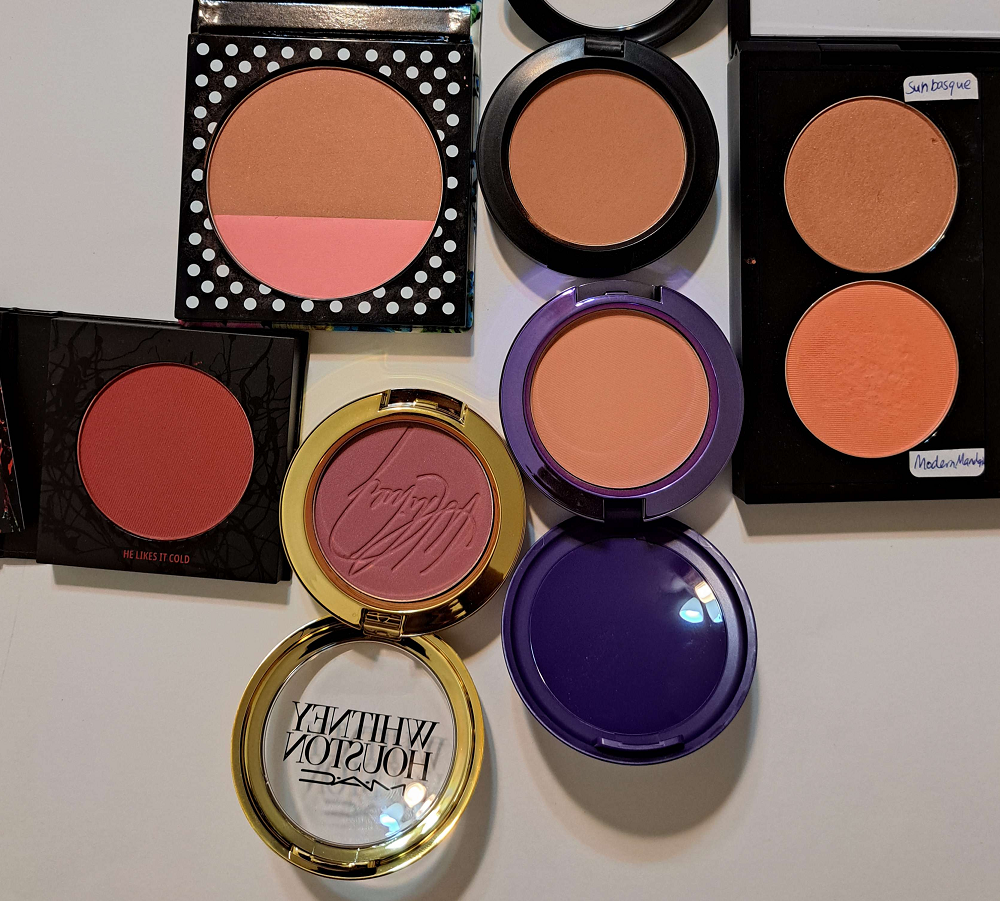
I only got rid of the expired lip products, which were a few Propa Beauty Lipsticks, the Melt lipstick, and Sephora Collection one. I also left behind the MAC lipsticks, except the one from the Whitney Houston Collection, because I had them mainly for collector purposes and knew I wouldn’t wear them. That’s where I would have loved to stop, but the baggage weight limit required me to leave behind even more. Because my remaining Propa lipsticks were oldest, it pained me, but I had to leave them. I also dropped the Juvia’s Place lipsticks because I was fairly sure they ship to Germany and that I would potentially be able to replace them if I really missed them during one of their massive sales. It turns out, I did not miss them.
Of the remaining bullet lipsticks, I will showcase the only older ones that haven’t been previously reviewed.
Hourglass Unlocked Satin Crème Lipstick in Dahlia 318

The luxury-packaging-lover in me is still happy that I bought this lipstick, but I was never satisfied with the brand’s shade options. The initial excitement customers had surrounding the launch seemed to have disappeared so quickly afterwards, even when the brand extended the range. I can’t recall any beauty YouTuber that mentioned the lipsticks again even one month post-review. Considering how long it has taken me to talk about this, I can’t say I blame them!
The real reason I never bought more is truly because I didn’t think any other colors would suit me based on how the shades looked in Youtube videos and Instagram versus the photos Hourglass put out. At a $38 retail price, I wasn’t about to take anymore chances. I mean, Dahlia looks a bit darker than the bullet, but on my lips it is such a brighter pink!

Over time, the color has gotten even bolder. The dye called Red 27 is the one that is used in all the ph-adjusting products. This contains Red 28, which looks extremely close to that tone of fuchsia, which I’m not a fan of seeing on myself.
I love the amount of shine the satin finish gives. It’s not too creamy as to slide around everywhere. The pigment level covers enough of the dark pigmented spots on my lips for me to be happy. I believe this used to have a typical vanilla scent, but after having it so long, it smells slightly sweet, waxy, and spicy. I think mine is reaching the point of being too old to wear.
It feels very nice on the lips, but gets drying towards the later hours of the night. I think it’s because it has a slight staining effect and stains tend to dry out my lips. It feels comfortable for the majority of the day though.
Touch ups are still a must for anyone that wants to keep the moisturizing glossy layer, but be forewarned that this will definitely transfer onto whatever it touches.
Besides the packaging and the finish, I really liked the shape of the bullet as it was easy to apply and stay within the lines.
Overall, I do still like this, but I won’t be buying additional colors because I prefer more non-tradtional lipstick formulas and because of the shade range.
Suqqu Sheer Matte Lipstick in Houjitsu 112
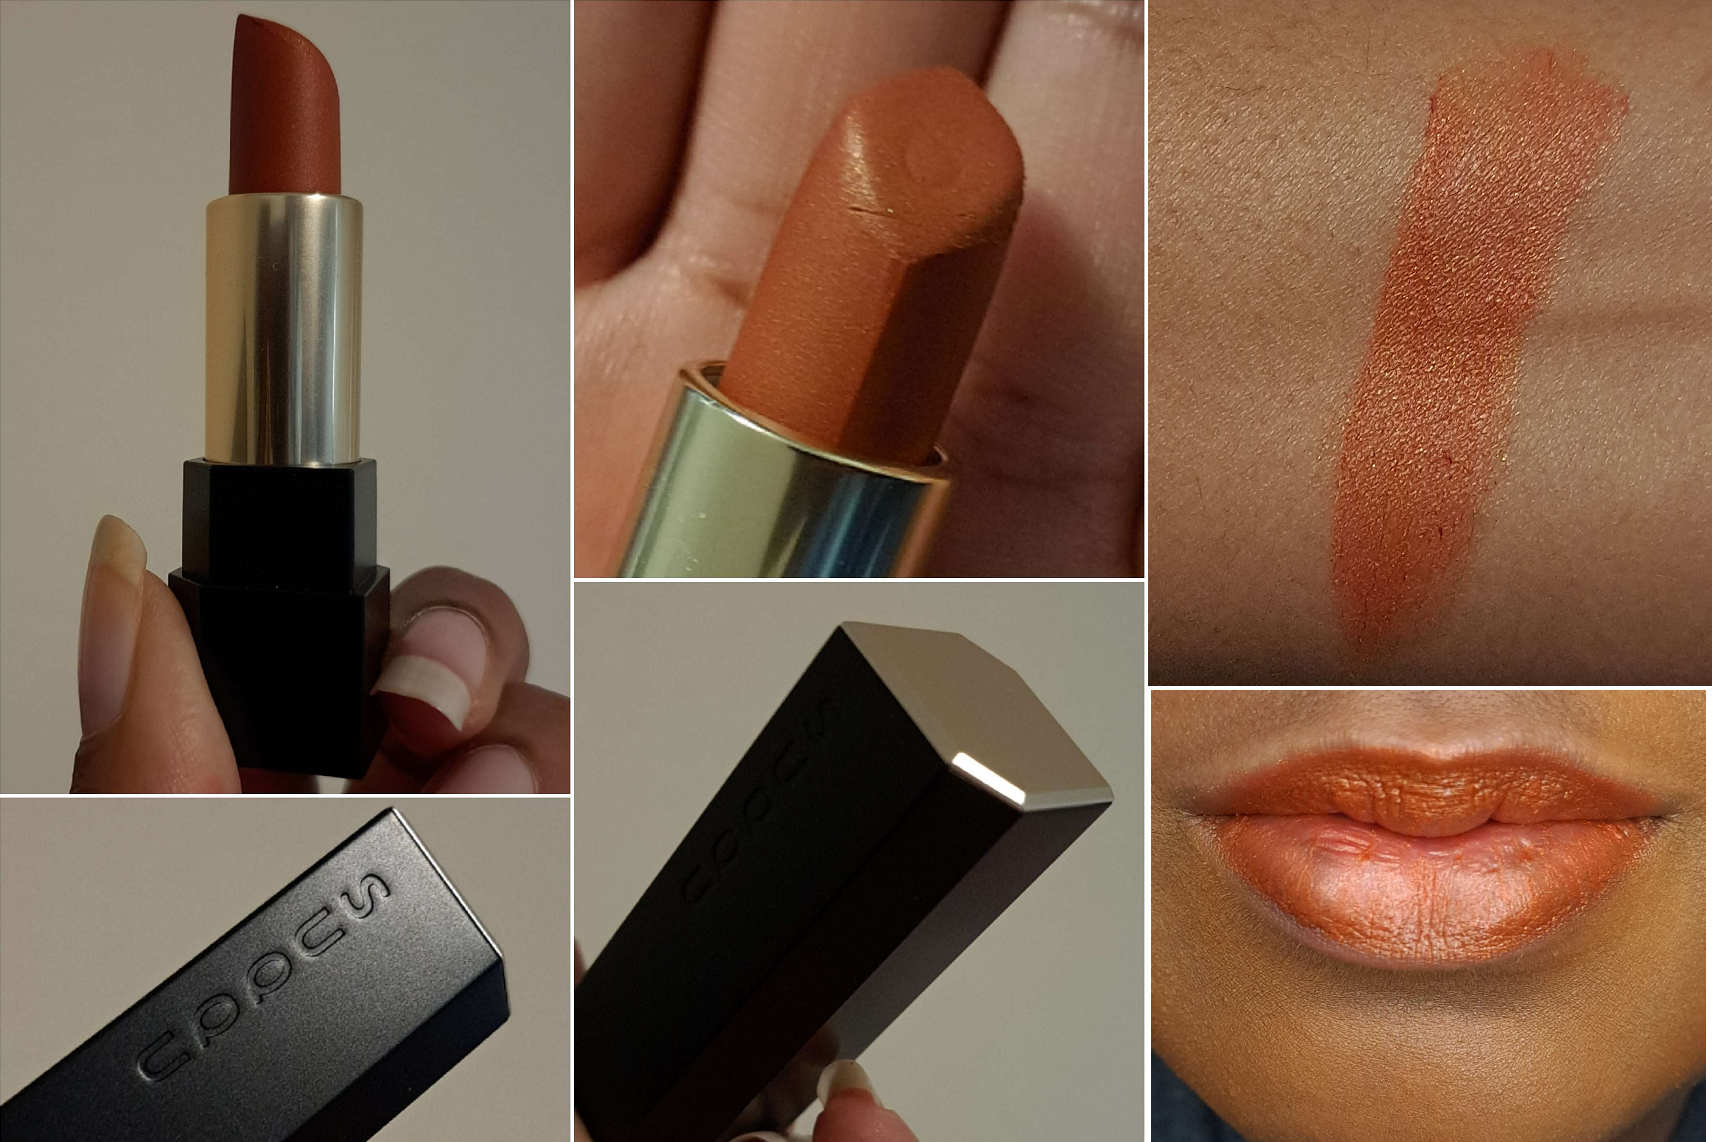
It’s so interesting that this is a “matte” line, but for this limited edition shade, Suqqu added fine shimmer that gives this a somewhat metallic look. In the same way that many matte cream blushes still have a creamy (and therefore minimal wet sheen) look to them, the lipstick looks almost satin. Although I can’t do it effectively with this shade, I can see how other colors could help create a soft and pretty blotted lip look.
The combination of waxes, oils, and silicone based ingredients makes this lipstick feel very comfortable on the lips. It easily and smoothly glides across the lips without tugging. It also leaves a very minimal imprint on glasses or anything else the lips touch. For a sheer lipstick, I consider the staying power to be decent, but a few touch ups are necessary throughout the day. I really like this formula! Even though it doesn’t feel drying, if I try to wear this two days in a row, my stubbornly dehydrated lips will punish me for it. This is not unusual for me, and it’s why I wear balms and glosses far more often than lipsticks, but I wanted to mention it anyway.
This is not a fully opaque lip product, but it can be built up a decent amount. In this case, sheer doesn’t automatically mean subtle. Although this particular shade is discontinued, Suqqu has a permanent range of color options. Just know that the brand does not sell the lipstick together with the lid/case. Ordering the lipstick alone will get the customer the lipstick bullet in the base with a small clear plastic cap on top. They sell the matte black and gold covering/lid separately under the name “Sheer Matte Lipstick Cap” for around $4. Because of the unique six-sided shape, no other case will fit over it except the one Suqqu makes. When I was living in the US, I could only buy Suqqu from Selfridges, and it takes them forever to restock them. So, I couldn’t get the proper top for the lipstick until five months later!
I appreciate the brand’s efforts to produce less plastic, but no one who buys high end or luxury goods want to spend so much money to then be forced to keep a cheap plastic covering over the product for nearly half a year! There should be a guaranteed way to ensure every customer’s first lipstick will come with a proper case. This honestly ruined my initial experience with the lipstick and it’s why I never included it in my other Suqqu reviews. This is also why I decided that if I ever wanted to try a line of Suqqu lipsticks again, I would buy the case as soon as I saw it offered even if I didn’t plan to get the actual product until much later. That’s what I did with the Moisture Glaze in 2025!
Liquid Lipsticks

Top Row (L to R): Juvia’s Place, Lisa Eldridge, Colourpop, Huda Beauty, Oden’s Eye, and Ofra.
Bottom Row (L to R): Rare Beauty and Kaleidos.
This was an easier category to sort through because my dry lips can only tolerate very few formulas. I tossed the expired ones: Ofra, Rare Beauty, and Kaleidos’ Wild Apple and Skinship. The Juvia’s Place lippies didn’t suit me without a lip liner, so I left that behind. The Oden’s Eye ones aren’t as comfortable as Kaleidos Lip Clays, so it seemed smarter to hold off on bringing them. I didn’t declutter the Colourpop x Sailor Moon one for nostalgia, but it had to at least stay behind. The Huda set was new and the formula reminded me of the KVD ones I used to like. However, since I hadn’t done a proper wear test beforehand, and didn’t want to take products with me that I was unsure about, I left them too.
It came down to bringing my Lisa Eldridge Velveteen Liquid Lip Colour (which I used along with other products on my wedding day) and the Kaleidos Lip Clays. I wanted to bring all eight left, but space dictated that I narrow it down to six. I was pretty adamant about keeping those too, but when I had to whittle down the top favorite lip products, liquid lipsticks made no sense to keep a lot of considering how infrequently I used them (even in favorite shades). Mahogany and Sienna were all I had room for, along with Lisa Eldridge’s Muse. I have not purchased any additional liquid lipsticks after that Lisa Eldridge purchase.
Lip Balms (plus lip primer and a satin lip pencil)

Summer Fridays, Nars Satin Lip Pencil, MAC Lip Primer, Nars, Makeup by Mario, Tart, Cay Skin, Kaleidos, Vacation, Beekman 1802, Rare Beauty, MAC Glow Play, Colourpop
This category had so many products I hadn’t yet tried or reviewed, that I decided to only take new balms with me, plus my Nars Satin Lip Pencil. I hoped I would love at least one of the new ones enough to make it worth leaving behind my favorites (the Nars Laguna balms for the look on the lips not the formula) or repurchasing old favorites. Unfortunately, I was missing having a good conditioning balm and needed to buy quite a few in 2024, which are not pictured above. In 2025, I ended up bringing one of the Nars Laguna balms back with me.
Beekman 1802 Goat Milk Lip Balm, Vacation Strawberry Jello Salad Lip Balm, and By Terry Baume de Rose (in pot and liquid form)
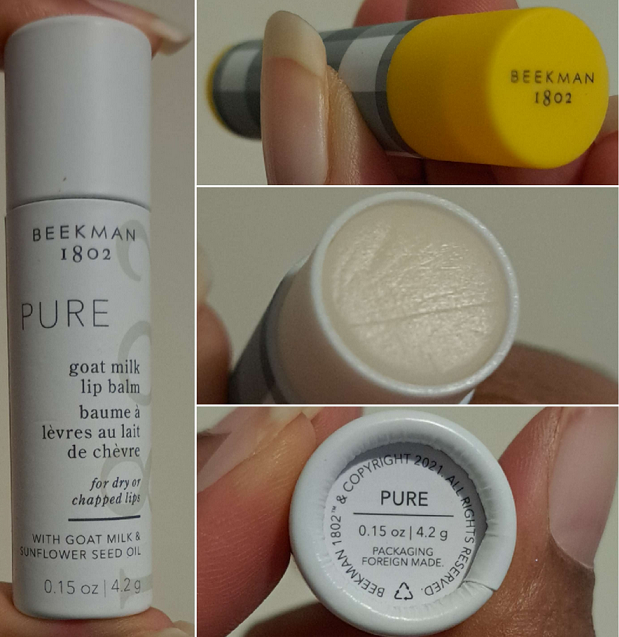
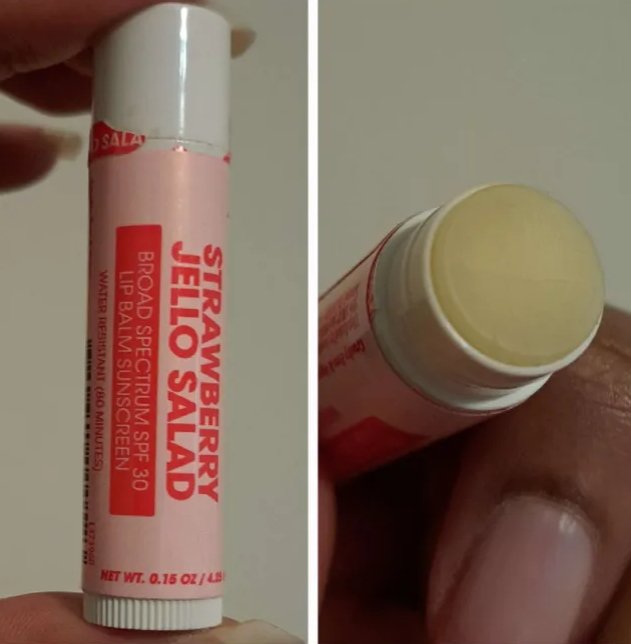


I basically roped all of these together because they were not memorable. I took the photos a year and a half ago and only remember that the By Terry one had a rose scent, the strawberry smell in the Vacation balm was very mild, I couldn’t smell anything in the Beekman balm, and absolutely none of these were conditioning enough for my lips. The By Terry lip products were quite old and had been lost in my collection (both samples), so perhaps I didn’t give those a fair enough try. The others, I recall being unhappy with during the testing process and would not recommend them.
Nabla Viper Lip Masks

These were a 2024 Black Friday purchase. I was curious about the formula, coming from a brand I respect, but this was a rare time that I specifically sought out a product with added fragrance. How could I resist Cookie or Peach ‘n Apricot? Even Midnight Orchid smells fantastic, and I’m not usually a fan of florals. Coconut Cream has the mildest scent, but it’s also good.
I missed the delicious scents of Laneige products and hoped these would be an even better alternative. I believe this is!
This consistency is a firmer wax, making it less Vaseline-like than Laneige Lip Sleeping Masks. It isn’t as easy to spread if I put it on directly from the container. However, after it has been on my lips for a while, I can rub them together and the warmth will help finish spreading the product and evens out the layer. I noticed Coconut Cream and Midnight Orchid seemed slightly more emollient, but it might just be because they were the last ones I opened and are fresher.
From what I can see in the ingredient lists, these four are mostly similar, but Peach ‘n Apricot has the order switched around in a few places, plus it has a lot more natural fragrance ingredients than the others (limonene, linalool, geraniol). They all contain flavor/aroma, but Midnight Orchid and Cookie contain vanillin and Coconut Cream has menthol. I feel the slightest bit of a cooling sensation from Coconut Cream, but it’s barely noticeable. This might be because there’s so little of it as the second to last ingredient.
This doesn’t feel as moisturizing or hydrating as my favorite lip balms, but it does a good job of sealing the moisture in and conditions them a little. I’ve been able to eat and still have about half left on my lips. There is enough dye to make Cookie, Peach ‘n Apricot, and Midnight Orchid look like different colors in the container, but they are all clear/slightly milky on my lips. These also have hardly more shine than a typical chapstick. They’re thick and waxy/balmy, but not sticky.

I can wear this when I want to indulge in the various scents, but I don’t use it on days when my lips need intense nourishment.
Lipglosses (and a few lip oils)
Top Row: Fenty.
Second Row: Prada, Huda, Vieve, Dior, Kaja, Sigma, Milk, Juvia’s Place, Pat Mcgrath, Suqqu, Nars, and Pur Cosmetics.
Horizontal Row: By Terry and Anastasia Beverly Hills
Bottom Row: Lunar Beauty, Colourpop, Charlotte Tilbury, Lisa Eldridge, Ami Cole, and Too Faced.
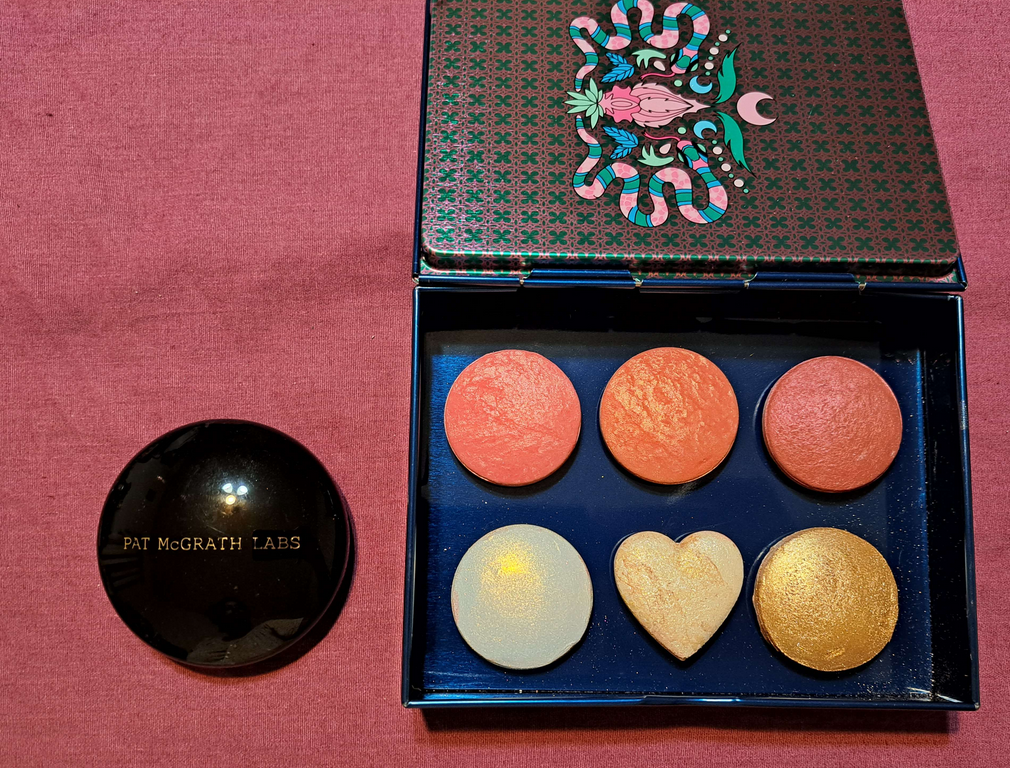
I love all of these glosses, but as a low-pigment product, I had to prioritize the best ones and ones that still needed to be reviewed. It’s actually easier to show a photo of which ones survived the first round of declutters (left side) and which ones got left behind purely for being old (right side with the exception of the extra Too Faced Hangover Pillow Balms that I just had too many shades of).

The only “old” ones that passed the first round were the Charlotte Tilbury mini size gloss and the heart shaped Pat Mcgrath Glosses, but since my combined total of lip products weighed 3 pounds…then 2 pounds after whittling it down some more, I had to leave Charlotte’s behind (I kept PML Flesh 6) along with dropping the Fenty glosses, the brand new Kaja one I had no attachment to, and Lunar Beauty. The latter was left behind because I decided not to feature that brand on my blog and would not need to keep it around to review it. I kept one Suqqu Treatment Wrapping Lip, the Sigma Lip Cream, a colorless mini of the Too Faced Pillow Balm, and the original shade of Ami Cole Oil/Gloss since it was full and would last longer. I was halfway through finishing Bliss. I now have a backup in 2025 in the shade Happy that I will not open until my current one is finished. I technically have two more backups in the US.

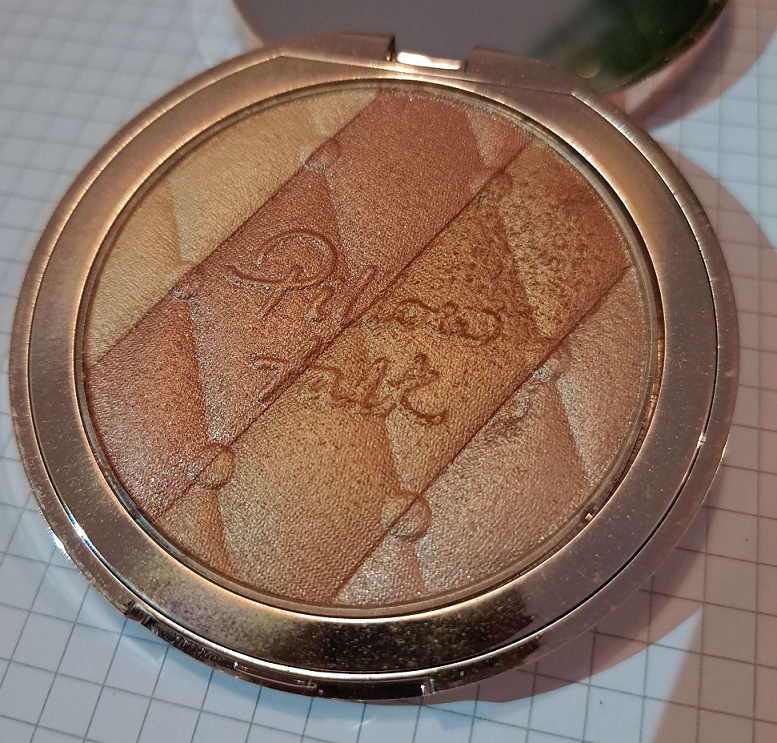
I was planning a giant Lisa Eldridge lip post, so both glosses had to come. I kept PML’s Bronze Temptation that I had in my purse during my wedding and kept Colourpop Hocus Pocus 2 So Glassy Lip in Boys Will Love Me for the unique color. Vieve Lip Dew was kept to review.
Rather than repurchasing Fenty’s Gloss bombs last year, I ended up getting different versions in the form of the Gloss Bomb Stix in Spice Cold and the Gloss Bomb Oil in Coppa Cookie, both of which have been reviewed.
Ami Colé Lip Treatment Oil in Bliss and Excellence (Original)


This is currently (and has been for over two years) my favorite and most nourishing lip product in my collection. I was able to let go of my Nuxe Reve de Miel and Sara Happ balms because this product. It contains Baobab, Camellia, Pentaclethra Macroloba, and Passionfruit Seed Oils, which are all oils I have very little experience with. However, my current number one foundation contains Camellia, and that oil is in a few of my favorite hair products too, so it makes sense that Camellia oil is amazing for my lips as well! As for Passionfruit Seed Oil, it’s in my favorite Cleanser/Treatment from Lisa Eldridge.
The hydration level is such that I can wear this once and then skip wearing a lip product for 3-4 days before my lips will start to show signs of chapping. It also softens the skin, which means I have an easier time removing the dead skin/chapped skin off of my lips. This was such a miracle product while I was still struggling to create a routine and was frequently forgetting to put anything on. The formula helps repair my lips when they’re in a bad state, but it instantly looks smoother and plump from the glossy shine. It’s a thick product, and its biggest downside is that it’s very sticky. However, that stickiness is what helps to keep a sealing layer to lock in moisture. It also helps this product to last longer on the lips without needing as many reapplications, as well as remaining on the lips overnight while sleeping.
In addition to it being a lip treatment, I get the benefits of the sheer color. Bliss can look a bit too light if I use too much, but I still find it to be pretty. I left it behind in the US because of the second flaw, which is the leaky packaging. There is never an excess of product around the rim when I put the applicator back in the tube, but sometimes I would randomly open it and product will spill out as if it overflowed, or I will in fact find that it leaked outside of the tube enough to feel sticky (though not enough to form a puddle). I don’t know if it has to do with air bubbles/suction that I hear while I try to close it. For this reason, I always try to keep these stored upright.
The original shade, now called Excellence, was unopened before I moved. So, I brought that one to Germany with me. Between the two shades, I have used up close to one tube’s worth of product. This is a rare accomplishment for me, proving how much I actually use these Ami Cole lip oils/glosses. The only reason I haven’t gone through them faster is because my husband can’t stand when I have sticky lips, and even if I try to wipe these off, he can still feel the remnants. So, I have fewer opportunities in which to use this product.
I am so sad about the fact that Ami Cole will be closing its doors in September. I have some lippie backups, so I will try to enjoy them for as long as I can before they go bad.
Dior Addict Lip Maximizer in 039 Intense Cinnamon
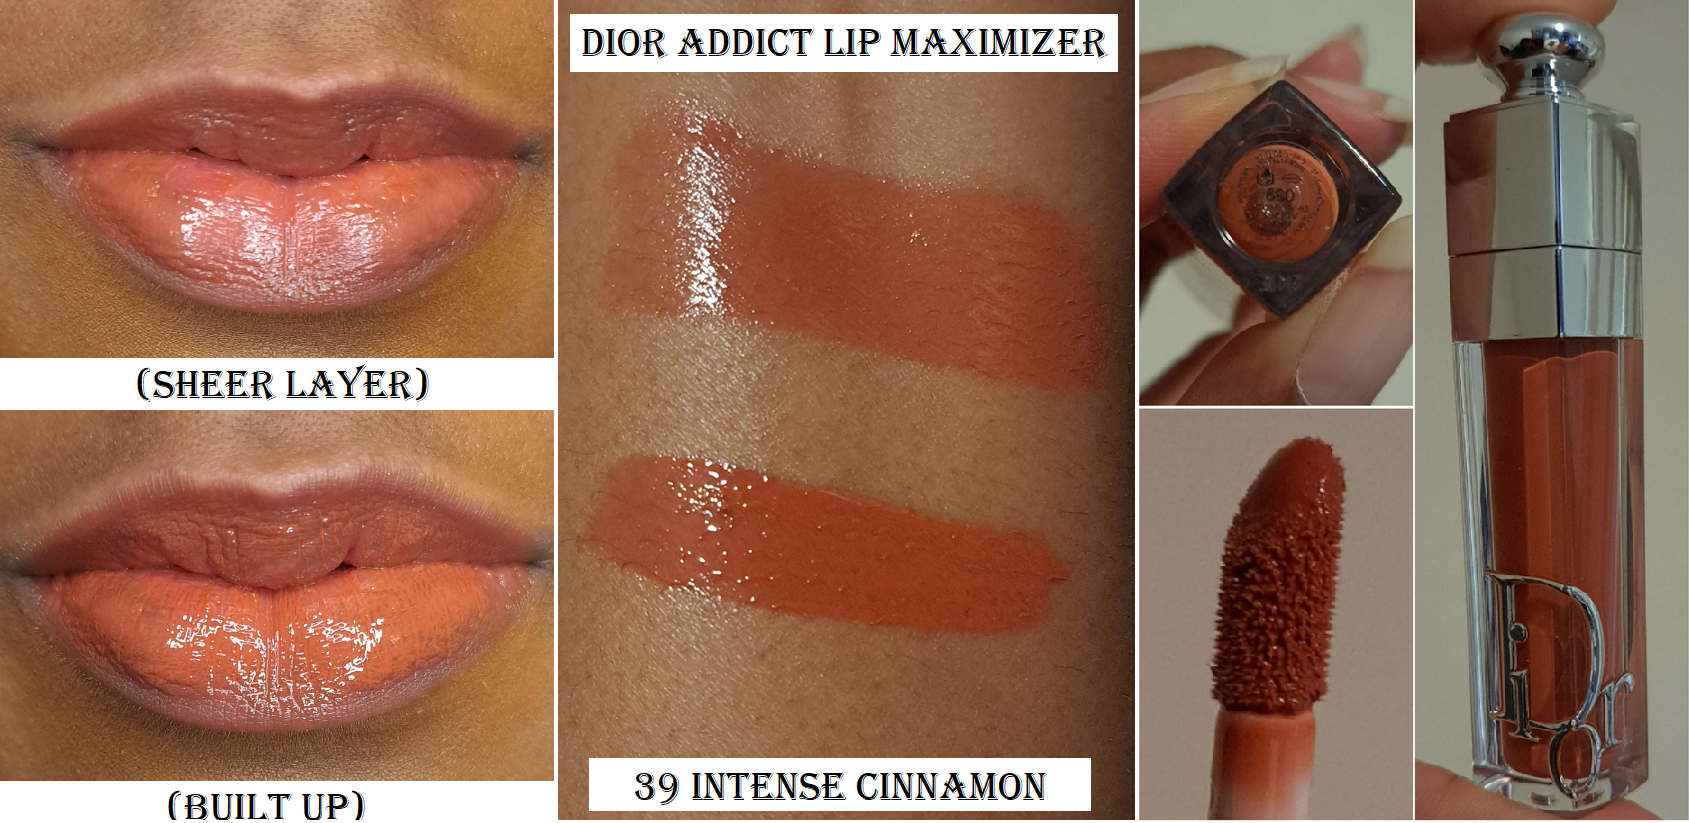
I feel a cooling sensation on my lips that lasts several hours after I put this on, which I don’t enjoy. It’s at least better than having a plumping burning sensation that I would like even less.
I don’t get a smooth color application right away. It takes some work by rubbing my lips together to get it to look even. It’s also easy to go outside my lip lines, especially when trying to smooth it out. However, it’s still better at creating an even look of color than the Fenty Cream Gloss Bombs. This one, once smoothed, will stay that way until it’s gone or until I feel the need to layer on some more.
This is fairly sticky on the lips and it does not improve my lip dryness. My lips look moisturized with it on, but when the product is removed, I can see all the chapped parts (plus a bit more than before). My lips look so nice with it on that I’ve been tempted a few times to try other colors in the range, but I prioritize conditioning over looks. So, it wouldn’t make sense for me to buy more. This is one of those long hyped products in the luxury beauty sphere, so I’m glad I could at least experience it, even though it wasn’t a great purchase for me.
Clarins Lip Comfort Oil in 01 Honey

This lip oil was far too hyped up for me to never try it. I was just waiting for a great discount, which is why I eventually got one in October 2024. I chose the classic honey color (basically colorless on the lips) which smells deliciously sweet! I like the big applicator paired with the strong stopper that prevents too much oil from coming out, but allows one to cover the lips quickly with the larger surface area.
It leaves a nice moisturized coating on the lips that has some adherence, but it not being sticky means it has an easier time coming off than lip oil hybrids. I try to give it the best chance of lasting on my lips by putting on two layers instead of just one. This amount doesn’t feel goopy, doesn’t drift past my lip line, and feels medium-weight on the lips. Three layers would be too much for me. I still get a good amount of shine from two.
I’m happy to say the ingredients hydrate quickly enough that even when I forget to reapply after a meal (since it usually lasts through drinking, but very little remains after eating), my lips continue to feel soft and smooth. It doesn’t last through the whole night as an overnight treatment and doesn’t hydrate enough that I can skip wearing anything on my lips for more than a day, but as a nourishing product, this is among the ranks of the better performers in my collection. I sometimes wonder if I should try other Clarins lip products, but since I don’t see anyone raving about them, I’m going to continue to push my curiosity aside.
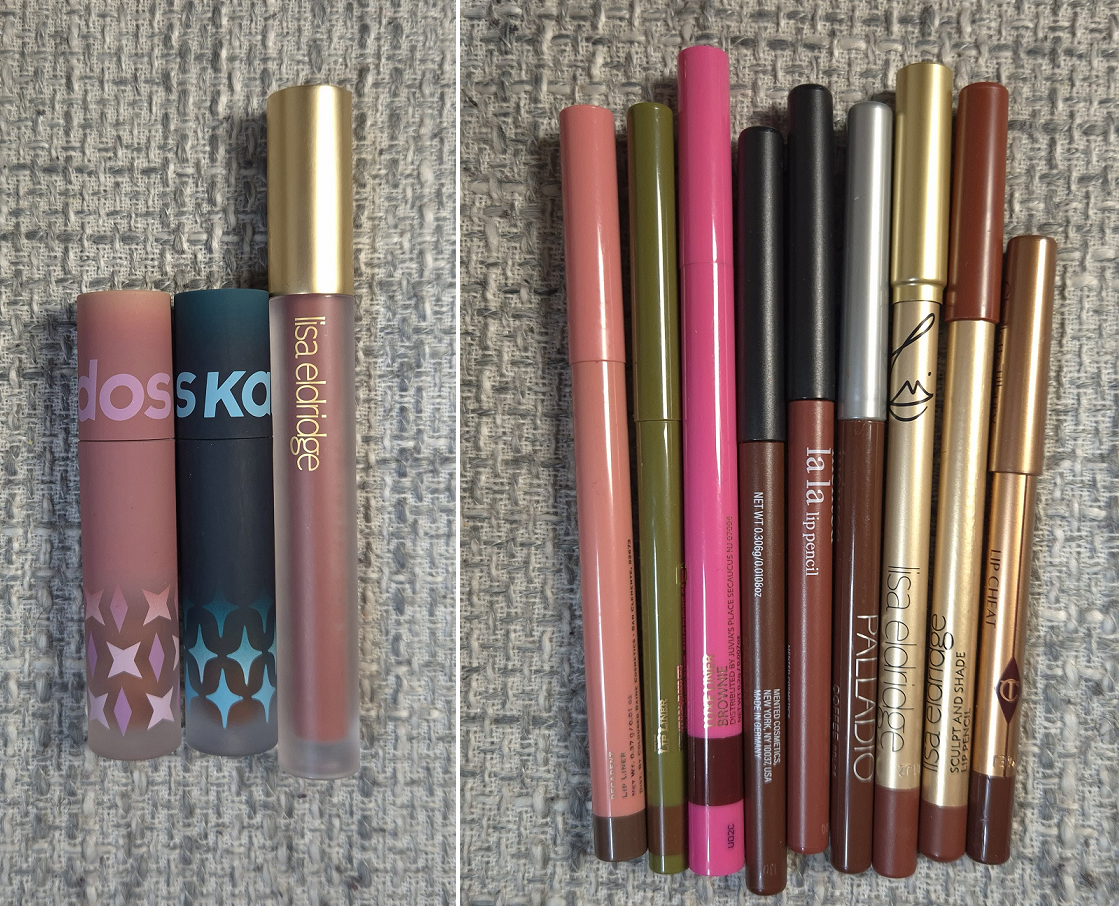
Lip Liners

Coloured Raine, Juvia’s Place, Mented, Nyx, Palladio, Lisa Eldridge, and Em Cosmetics.
I don’t consider myself to be too picky about lip liners. I just want something that glides easily on the lip line, feels comfortable enough to fill in my lips if I want to, adds definition, and is at least water resistant. What made the cut were Coloured Raine in Decadent and Pine, Juvia’s Place in Brownie, both liners from Mented, Palladio in Coffee, and Lisa Eldridge in Sorcery. I later ended up later buying her Sculpt & Shade Lip Pencil in 3W.
Unfortunately, Coloured Raine went out of business. I would say those lip liners were my top favorites, but I’m pickier about lip liner colors than formulas. There are no shortage of good ones, so I’m in no rush to replace them.
CURRENT LIP COLLECTION 2025
Bullet Lipsticks 2025

Row 2 (L to R): Charlotte Tilbury, Hourglass, PML, and Lisa Eldridge.
Row 3 (L to R): Suqqu and YSL
I wouldn’t declutter any of my bullet lipsticks, however, I wish I hadn’t bought the Lisa Eldridge Rouge Refillable lipstick in the shade Lisa, and I could have done without Ashes of Roses and Simone. I have the Lethal Cosmetics Lipstick for collector purposes. I bought the Hourglass and Suqqu (Sheer Matte) to satisfy my curiosity, but I wouldn’t be sad if they were out of my collection. Lastly, I wish I hadn’t bought quite so many YSL lippies. I should have stuck to just one single engraved lipstick and skipped buying the Loveshine Balms. I love the Candy Glazes, but if Shade 16 (Watermelon High) was released at the same time as Shade 15 (Showcasing Nude), I wouldn’t have bought 15.
Lip Balms 2025

Top Row (L to R): Summer Fridays, Nars, Rabanne, Lisa Eldridge, Nars, Makeup by Mario, and Nabla (stacked in a line).
Bottom Row (L to R): Labello, Nuxe, Rom&nd, Nivea, Prada, and Lancome.
I intend to declutter the Labello and Unscented Nivia lip balms because they add no color and are the weakest at conditioning my lips. I’m keeping the Makeup by Mario purely for reference purposes. I replaced my old Summer Fridays balm, and I could have done without having an extra Rabanne Balm (or at least without one that is practically clear on my lips). I am also keeping the Nuxe stick balm because I haven’t even opened it yet.
Lip Glosses and Oils 2025

Row 2: (L to R): Nuxe, Fantasy Cosmetica, Vieve, Sigma, Pat Mcgrath, and Suqqu.
Row 3 (L to R): Colourpop, Lisa Eldridge, Ami Cole, Too Faced, and Clarins.
The Fenty Gloss Stix is my favorite of their lip formulas, so I could declutter the lip oil. The Nuxe lip oil was disappointing, so I should get rid of it, but the shape is so cute that I feel compelled to hold onto it for longer. The Too Faced Kissing Jelly could also be decluttered, since I prefer the Pillow Balm formula.
Liquid Lipsticks and Lip Liners 2025
Lip Liners: Coloured Raine, Juvia’s Place, Mented, Palladio, Lisa Eldridge, and Charlotte Tilbury
My liquid lipstick pile is unchanged and my lip liner pile has grown slightly. I intend to keep them all the same until they are bad and need to be tossed out. The Mented lip liners are probably too old, but I haven’t been using them anyway.
The only unreviewed lip products I bought between 2024 and 2025 are the Suqqu Moisture Glaze, MAC Lustreglass Sheer-Shine Lipstick in Posh Pit, Nuxe Lip Oil, and Nuxe Lip Moisture Stick. So far, the only unreviewed lip products I bought in 2025 are the Charlotte Tilbury Unreal Lips Healthy Glow Nectar Oil (forgot to photograph) and the Charlotte Tilbury Pillow Talk Lip Kit that contains minis of the K.I.S.S.I.N.G Pillow Talk Deep (Intense) lipstick and Lip Cheat Pillow Talk Deep lip pencil.
The Charlotte Tilbury lip products will likely be reviewed in the future. The others I forgot about, so I don’t feel compelled to really review them unless someone requests them.
Anyway, that’s everything! My lip collection has been fully updated! I have too many lip products, which is why I’m trying my best to cut back on purchasing more.
-Lili ❤