I love “What’s in My Travel Makeup Bag?” type of posts for only one reason: wanting to see which products someone couldn’t be without. The products I took with me traveling were chosen for so many other reasons besides that one, so I reconsidered making this post. However, I thought about how I was able to pack the least amount of products for the longest trip I’ve been on and realized this could be useful to those wanting ideas of what to take with them and things to consider for extended stays. I will also discuss what I learned about shopping for makeup in Germany and I’ll review the items I purchased while there.
Anything Will Do
When it comes to lips, brows, and face primers, I find that pretty much any products in those categories will get the job done. They all work well, but I could have replaced them with any others in my collection. I chose the 15ml travel size of the Good Molecules Silicone-Free Priming Moisturizer because it can double as a primer and moisturizer, which saves space with its compact form and from having to bring a second item. The ELF Instant Lift Brow Pencil could have been swapped out for my Anastasia Beverly Hills Brow Wiz or the Benefit Precisely My Brow pencil, but the $3 price made it ideal so that if I misplaced it, it wouldn’t be much of a financial loss. The Tower28 Gloss was chosen because I am on an unofficial project pan and want to see if I can use it up within a year. Otherwise, I would have taken the Fenty Gloss Bomb or my other mini glosses with me instead. I did a lip declutter earlier this year, so any lip pencil in my current collection could have replaced the Mented Nude La La Lip Pencil, but I chose it because it’s the one I’ve used the least, is a shade I could use all over the lip and not just as a liner, plus it doesn’t require a sharpener.
Backups/Replaceable Items
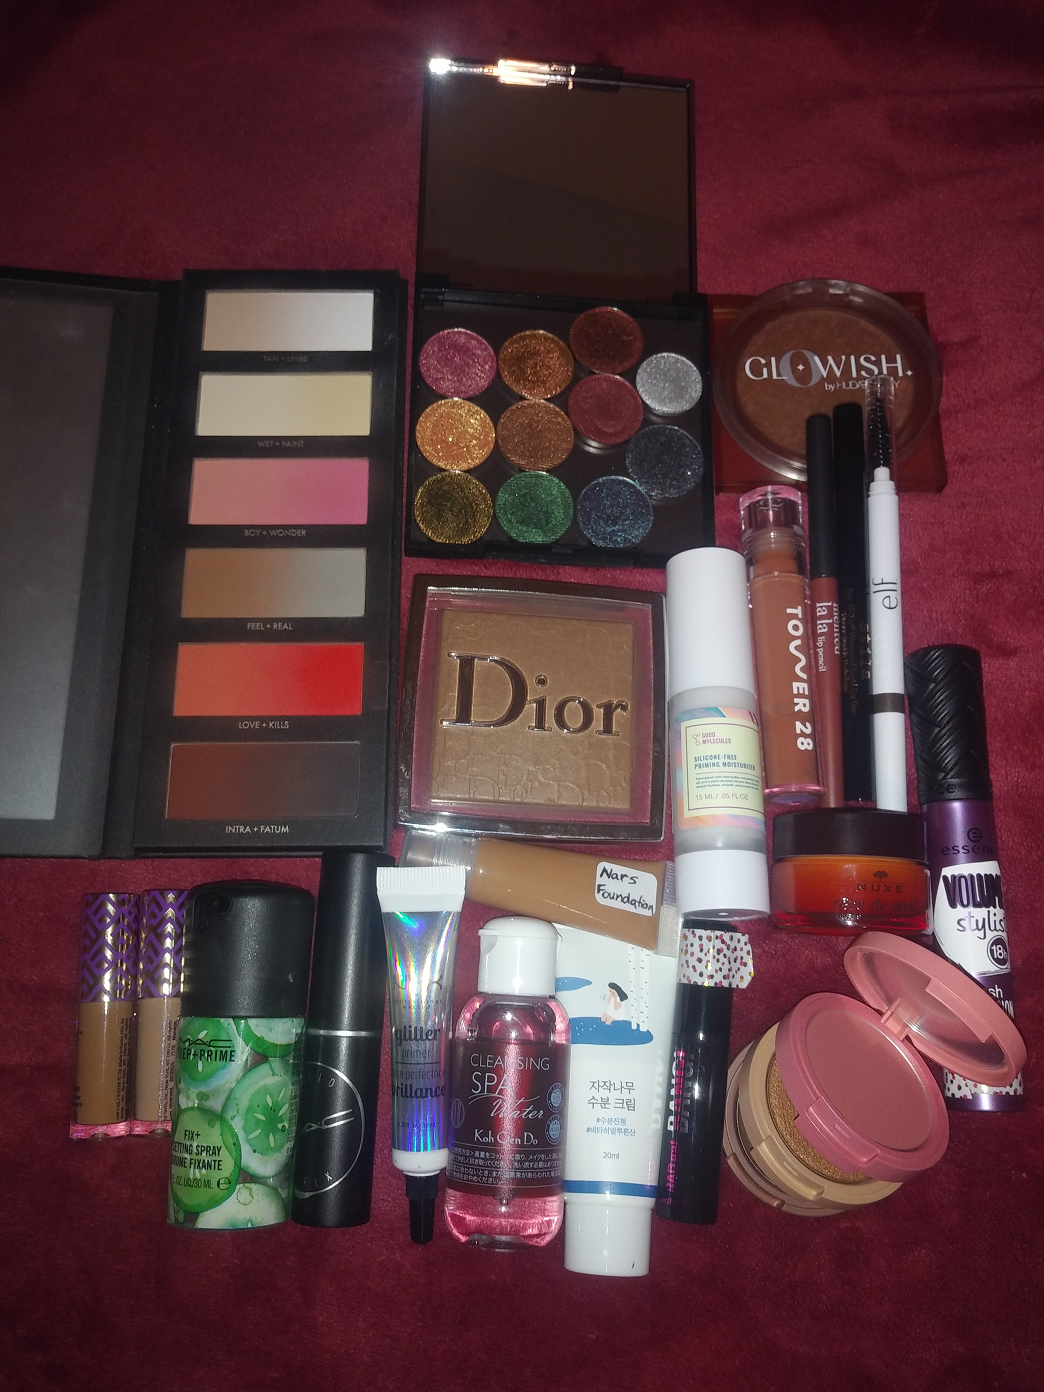
Choosing the Stila Stay All Day Waterproof Liquid Eyeliner was an easy decision because it was my holy grail eyeliner for a long time, it will last through different changes in weather, and I have multiples of them in my collection because I always get them at half price during Ulta’s 21 Days of Beauty sales or during the holidays. I knew I would be going back to Germany this year, so I didn’t want to bring a used eyeliner and have to worry that when I went back it would be dried up or run out on me. I also recently became reacquainted with my old holy grail lip balm, the Nuxe Reve de Miel, and went overboard buying three jars in total when they only have a 6 month shelf life once opened. So, I figured I could keep a spare in Germany as well. As for the brown mini lipgloss tube in the initial post photo at the top, I decided that I could use one of the empty tubes I had from my days of making custom products to store foundation in there. The tiny gift with purchase sample I had of the Nars Soft Matte Complete Foundation lasted me six months, so I knew the amount I squeezed in there would last through multiple trips. If you have a foundation in a glass bottle, it’s a great idea to store some in a small squeeze tube that helps limit the exposure of the foundation to air, has a small enough hole so that you won’t squeeze too much product out at once, and is of course more compact and won’t break during travel.
Speaking of broken things, I contemplated what to do with my repressed pan of Huda GloWish Soft Radiance Bronzing Powder in the shade 04 Tan since I was sent a replacement item. Although I got too dark on the trip to be able to use it, I figured I could keep the spare in Germany. Lastly, I only have one MAC Studio Fix Soft Matte Foundation Stick, but this item is replaceable in the sense that my holy grail eyeshadow primer is the MAC Paint Pot. This performs similarly to the Paint Pot but works better specifically with the Hindash Beautopsy palette I planned to bring with me. Also unlike the Paint Pot, it’s not in a breakable glass pot. Plus, I could use it as concealer in a pinch, though it isn’t dark enough for me to use as actual foundation. But if someone else traveling wanted to really pack minimally, the Foundation Stick could be used for all of those tasks.
Must Haves
If I wasn’t the type that loves having a variety to choose from, even on trips, I could have skipped bringing an eyeliner, brow pencil, blushes, and bronzers entirely because I took the Hindash Beautopsy Palette with me. I did skip bringing a contour and setting powder because I had this available. I use Beautopsy for so much more than eyeshadows and I’ve been raving about this palette for good reason. It could be a bit nerve wracking to take such an expensive product, but the packaging is intended for makeup artists, which means it should be durable enough to travel with anywhere. This is a must have for minimalists, but I took this because it’s such a staple in my makeup routine now that I didn’t want to be without it. Especially considering the fact that I got a little darker on the trip, my ability to customize the depth of shades came in handy and I used it more than all the bronzers I had with me. The only area which the Beautopsy palette lacks is having no shimmer options. I knew I would miss having shimmer shadows, so I used a custom magnetic palette to store my Devinah Cosmetics Eyeshadows. When selecting the colors, I wanted shades that would pair well with each other, could be used in subtle daytime looks or dramatic nighttime looks, as well as giving me neutral and colorful options. Of course it was tempting to want to bring my absolute favorite Clionadh shadows, but Devinah makes extremely similar quality of products with the added bonus of being made in the US with quicker restocks. This means that if for some reason my shadows broke irreparably (like the particles got mixed with each other and could not be separated), I’d probably have a replacement in weeks up to 2 months, as opposed to 1-6 months or more. Devinah shadows are also slightly lower cost per shadow with cheaper shipping for me. This choice was a combination of wanting my favorite eyeshadow quality while factoring the travel element. Of course, when using special shadows, the Nyx Glitter Primer is essential for keeping them in place and helping the shades pop. I always have replacement tubes (which is a good thing because my tubes keep busting at the top) so I brought this along as a necessity that happens to be inexpensive and replaceable.
What is definitely not inexpensive is the Dior Backstage Face & Body Powder-No Powder, but I absolutely had to bring it with me. I discovered that this powder is so fantastic for smoothing out the skin and blurring imperfections, which was crucial to have for this trip. The lighting at my boyfriend’s place was extremely tricky to see what I was doing while applying makeup. The lighting was either dim or yellow, which showed things differently than the LED lights in the main room’s 9-foot high ceiling, also different than the highly fluctuating natural light peeking out from grey and dark clouds most of the time I was there. Depending on the light, I could look like I had no bronzer or too deep of bronzer, no blush or looking like a flat out clown. When on a trip, you’re often in a time crunch, and I couldn’t keep waiting for the natural light to be sunny enough to complete my makeup. Having the Dior powder gave me confidence that the end result looked nice and fixed anything that needed fixing, even if the resulting look was more subtle than intended.
This may seem a bit extra, but I took two mascara tubes with me. Rather than just relying solely on a mini size for the trip, I needed a mascara like the Essence Volume Stylist 18 hr Lash Extension Mascara that would give me a false lash effect because there was no way I was going to bring falsies traveling. This is a very affordable mascara, so I could leave it in Germany and it will still hopefully be good when I get back. With a mini, I had no idea how many uses I could get out of it (considering I was there for three weeks), but it’s a good option to consider for those packing lightly. I happened to have a sample of the Benefit Bad Gal Bang mascara and I brought it with me because I remembered liking the original Bad Gal Lash mascara and hoped it would be good. The Bang version is even better! I love that it darkens and lengthens my lashes easily and without leaving any clumps. The brush also makes it so the lashes are separated and fanned out like a doll. I can also build up a little volume. It’s not as dramatic as the Essence mascara, but it’s enough to look like I’m naturally blessed with long lashes.
I have to name the Nabla Skin Glazing Highlighter in Amnesia as an honorable mention for a “must have” product on a trip, even though I didn’t bring it this time. I have taken that highlighter on all other trips since I first purchased it. It’s on the lighter side for me, but it still works beautifully on my skin tone to give me a subtle highlight or an intense one. It also matches both warm and cool toned makeup looks. The only reason I left it behind was because I ordered the Hatice Schmidt Labs highlighter in the Medium shade, which looked like a very close dupe and I did not want to have two nearly identical products on the trip, especially as I already had a usable highlighter in the Kaja Bento box I brought with me. Now that I have two similar products, I will likely bring the HSL on trips from now on because it’s slightly darker, slightly warmer, and with a slightly more transparent base which makes it that much more suited to my skin tone. It also has a mirror, which was helpful in the moments I was running around trying to see how my makeup was looking in alternate light sources. If I was more concerned about the weight of the products or the price of the products, the Nabla Skin Glazing would be a better choice. However, if something happens to my HSL product, I wouldn’t feel as upset knowing that I have the Nabla as my backup.
Made To Be On-The-Go
I could have put several of the products mentioned above in this category, but the ones I’m discussing here don’t really fit in any other category. For example, the Tarte Shape Tape Concealer is my holy grail concealer, so I purchased the travel size for the trip. It was ideal for it’s compact size (though at one tenth of the size of the larger one, it’s certainly not cost effective) and the assumption it would last me two trips. However, I suspect that the formula in the mini is not as full coverage as the full size tube. I had to use a lot more product to get the coverage I needed. Perhaps this is another situation of the lighting being an issue. I also brought a mini of a lighter shade in order to mix my perfect color, like usual, but there was no need to this time as Deep didn’t look as dark as the full size either. That’s why this is in the “made to be on-the-go” section instead of “must haves.” I have also mentioned that I like mixing the Shape Tape with Pat Mcgrath’s concealer, but that one is in a glass tube which I did not want to bring with me. In the future, I’ll just carry my regular full size Shape Tape on trips, especially since I also get them for half off during Ulta’s 21 Days of Beauty. In a past review of the Kaja Play Bento Sculpting Trio, I mentioned that this product was ideal for traveling, so I felt obligated to bring it. Honestly, the fact that I have the Beautopsy palette though makes it pretty redundant as I can make a bronzer out of that palette and create a similar blush shade. I love the cream bronzer, but I don’t trust wearing a cream product while on a trip for fear of transfer onto clothing or sweat. The highlighter is nice, but I will always want a more intense option too. I took this traveling with me because I wanted to test the durability, as well as having those other options, but I only used it once during the three weeks (besides keeping it in my small purse as a mirror). However, if someone doesn’t have a face palette or wants something more affordable, lightweight, compact, and travel friendly, this is still a good option.
In my photo at the top of the post, I have a mini bottle of the Koh Gen Do Cleansing Spa Water, but it’s actually filled with Bioderma Sensibio H2O Micellar Water. They make a mini version, but I didn’t want to buy one when I could just reuse a smaller thinner bottle in my possession by transferring it in from one of my many larger size bottles. I also have mini versions of the Original Makeup Eraser Cloth, but I brought a full size one with me on the trip. I also filled an empty package of SkinFood Rice Cleansing Wipes with some from a larger package. That way I could use a makeup wipe on a heavier makeup day that I was too tired to double-cleanse and also not carry a whole heavy package which has 80 wipes in there.
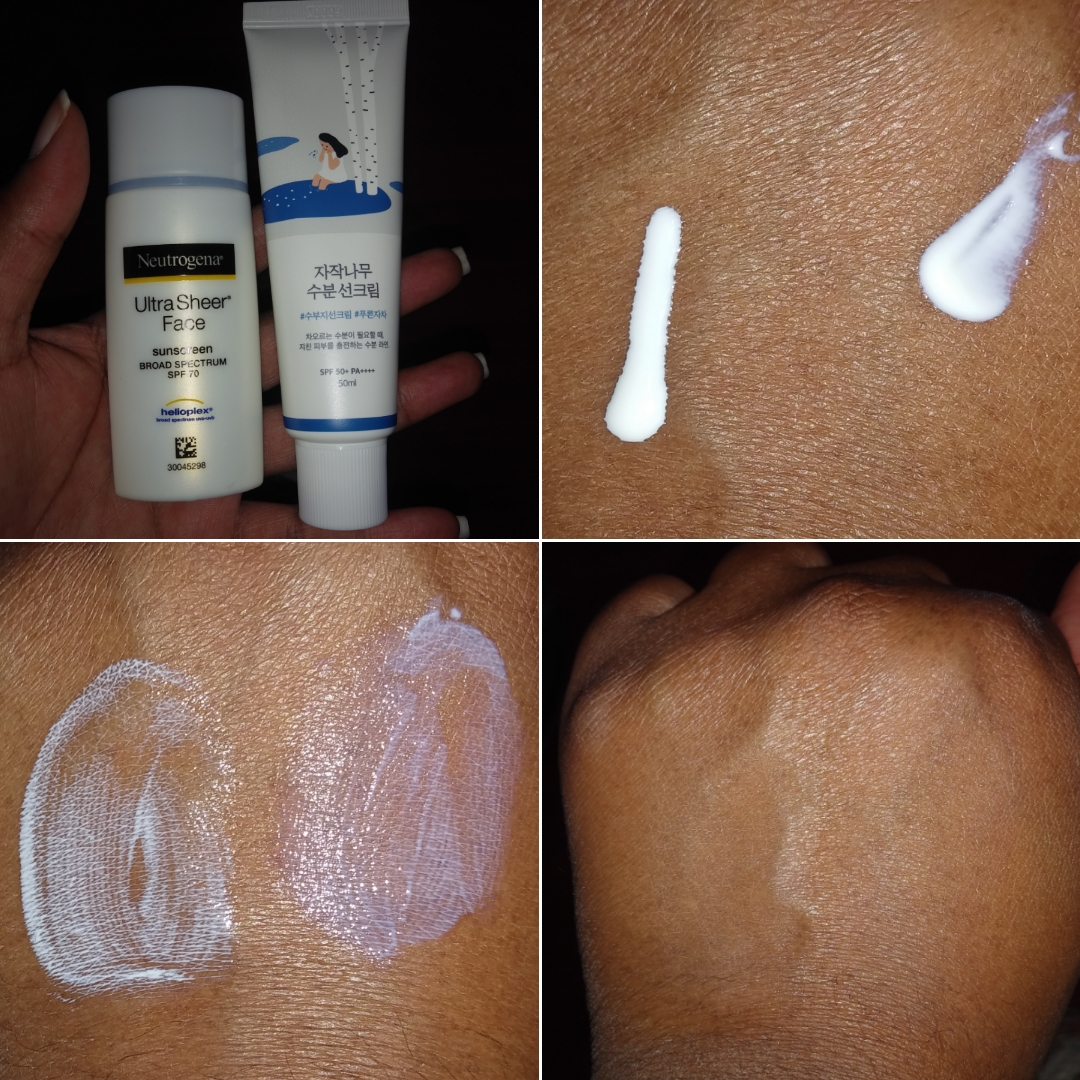
Lastly for this section is sunscreen. It’s not makeup, but it’s essential. I brought what I thought was a mini size of the Round Lab Birch Juice Moisturizing Sun Cream which came in the box with the full size sunscreen I bought. It turned out that the mini was the non-SPF version and I didn’t figure it out until I was back in the US. Since I was testing it out for the first time, I also brought my usual Neutrogena Ultra Sheer 70 SPF Liquid Sunscreen too. The Ultra Sheer is small enough that it doesn’t take up much room in my carry-on bag and is airport compliant at 40 mL out of 100 mL. I have since used the actual SPF version of the Round Lab and I like that it doesn’t leave a cast. It makes my skin look a little dull on the darker spots of my face with hyperpigmentation, but it’s barely noticeable on my bare face and it’s definitely not an issue under makeup. The Round Lab is twice the price at only 10 ml more, so I would have continued to purchase the one from Neutrogena if it sadly hadn’t just been discontinued a few months ago. I had been using it for seven years and was quite sad to learn it was gone before I could purchase one final backup. Since I haven’t even tested the Round Lab during a true Florida summer, I’m not ready to recommend it yet. When it comes to something as important as sunscreen, I wouldn’t feel comfortable recommending it unless I’d tested it through at least two summers.
The Ultra Sheer Liquid Sunscreen in the Sensitive version is not the same since it’s a mineral sunscreen which relies heavily on titanium dioxide, which is the main culprit that leaves a cast on dark skin. The Dry-Touch version of Ultra Sheer is definitely not the same (leaves a white cast on me), as well as other sunscreens from Neutrogena. I picked up several trial packets and sunscreen minis recently, so I will be checking to see if I can find anything that’s as lightweight and doesn’t leave a cast while also thoroughly protecting me from the sun. So far, the Round Lab is the best I currently own.
Additional Tips
When I was deciding what to pack, the first thing I did was write a list of all the makeup categories I could think of and filled out which products I would want to bring most. Then, in order to condense the list, I went back over my answers and thought about what things I owned that could accomplish more than one task to reduce the number of products I had to bring. I thought about which things I owned or could buy in mini sizes to save space and decrease the weight of what I’d have to carry. I kept in mind which items were easily breakable, replaceable, and what I would miss too much if I didn’t have it. I also debated about what items I could just skip bringing entirely and buy while abroad. One thing I forgot to consider was that even though I was leaving a lot of makeup behind in Germany, all the new products I purchased weighed so much more than what I initially took with me, so my makeup bag was heavier coming back. I could have skipped bringing the Kaja Bento as a backup if I thought about the fact that I was going to buy a highlighter and three blushes.
I also made the decision to skip bringing cream products. Although I knew it wasn’t likely to be hot in Germany, I was required to walk a lot more and figured I would probably work up a sweat. I intended to do a lot of hugging as well, so I didn’t want to risk taking anything that could transfer or sweat off. It was also windy at times and I wore my hair down a bit more than usual. Balmy products on the skin that don’t dry down would have been a bad idea. Thinking about how the makeup items will be affected by the weather and the activities on the trip is something to consider. Nothing I brought with me needed a setting spray and none of them (besides my eyeliner) were waterproof, but that might be necessary for someone else to pack.
Here is a sample list of the categories of makeup to think about when packing:
- Face Primer –
- Eye shadow Primer –
- Foundation –
- Concealer –
- Color Corrector –
- Eye shadows –
- Brow Product –
- Eyeliner –
- Mascara –
- False Lashes and Lash Glue –
- Setting Powder and/or Finishing Powder –
- Setting Spray (keep TSA requirements in mind) –
- Blush –
- Bronzer –
- Contour –
- Highlighter –
- Lip Balm/Gloss/Stick/Liner/Stain/Plumper –
One other thing I wanted to mention is that I was paranoid about the possibility of having lost luggage, so I packed some of my makeup products separately. The more fragile items, such as eyeshadows and pressed powders, I kept in my carry-on. My eyeliner, the full size mascara, the lighter concealer, etc were kept in my suitcase.
Douglas and Got2B Makeup
When I was shopping for makeup in Münster, I expected to discover plenty of German founded cosmetic brands that I hadn’t seen before. Perhaps this exists online, but when it comes to makeup at retail shops, the brands under the umbrella of major parent companies like L’Oréal, Estée Lauder, and LVMH dominate worldwide. It’s one thing to always hear that and quite another to actually see it for myself.
When I stopped in the Douglas shop, ARTDECO Beauty and ANNAYAKE (as well as the actual Douglas brand of makeup) were the only ones I hadn’t seen in the US. It was the same for drugstores, that only the actual store’s brand of makeup (such as dm of dm-drogerie markt) is unavailable in the US.
Of those unfamiliar brands, my purchasing options were limited to universal products like eyeliners and mascaras, as the complexion ones weren’t deep enough for me. I did snag a blush from Got2B. I was familiar with the brand’s hair products, but I had no clue until that moment that they made makeup as well! I tried to find out when they launched the cosmetics, and I believe it was in July 2021, so just a month before I got there, but I don’t know for certain. The ARTDECO products didn’t appeal to me, so I decided to try the Douglas brand of makeup as well, which is of similar quality to the Sephora Collection brand of makeup.

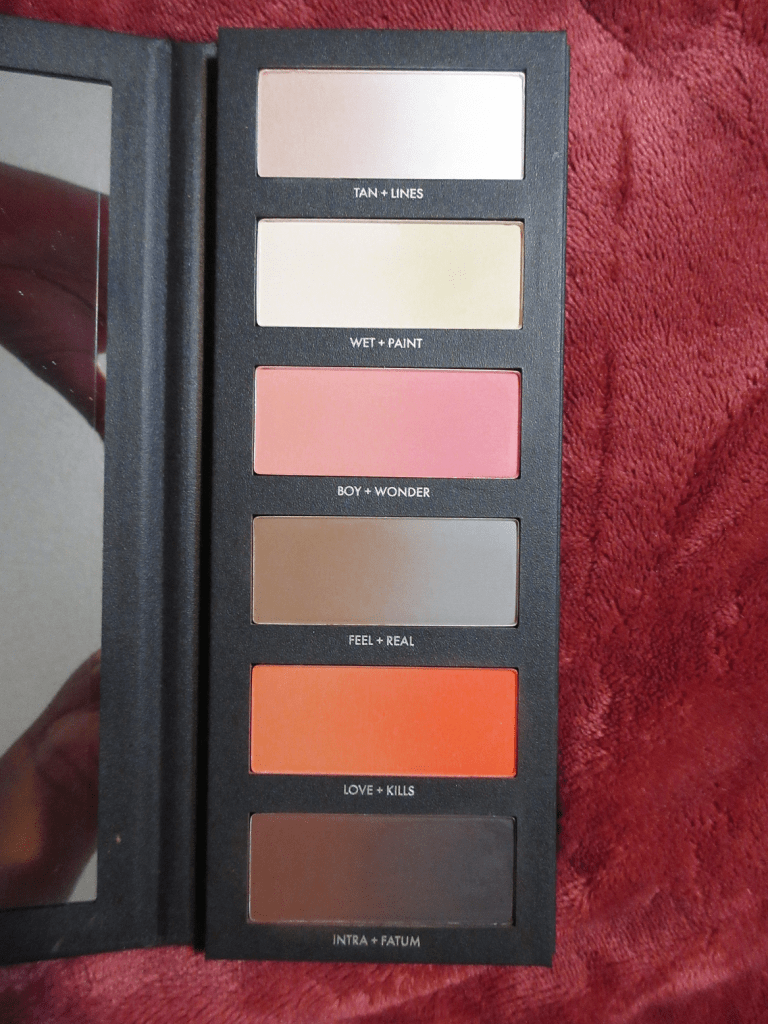
Douglas Cosmetics Caramel Nudes Eyeshadow Palette mini
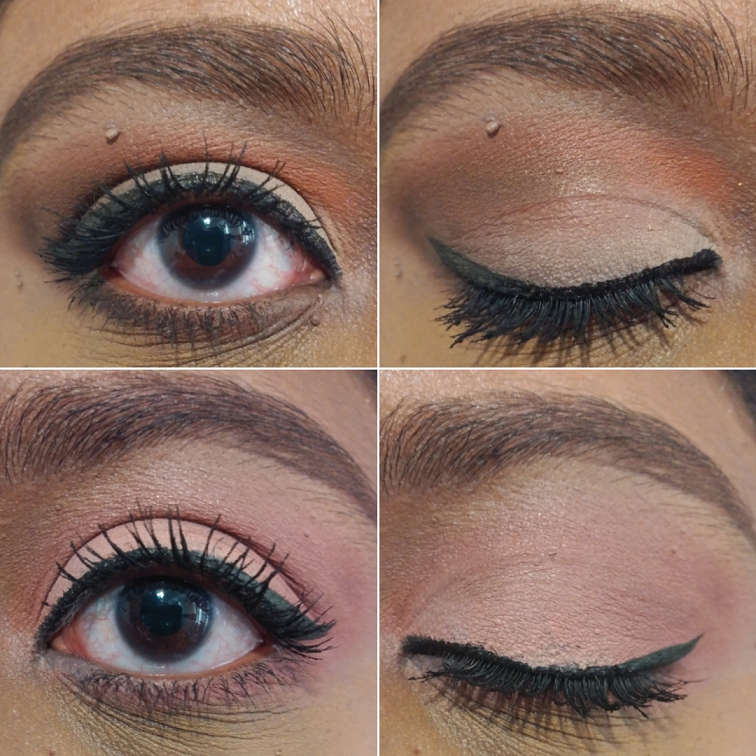
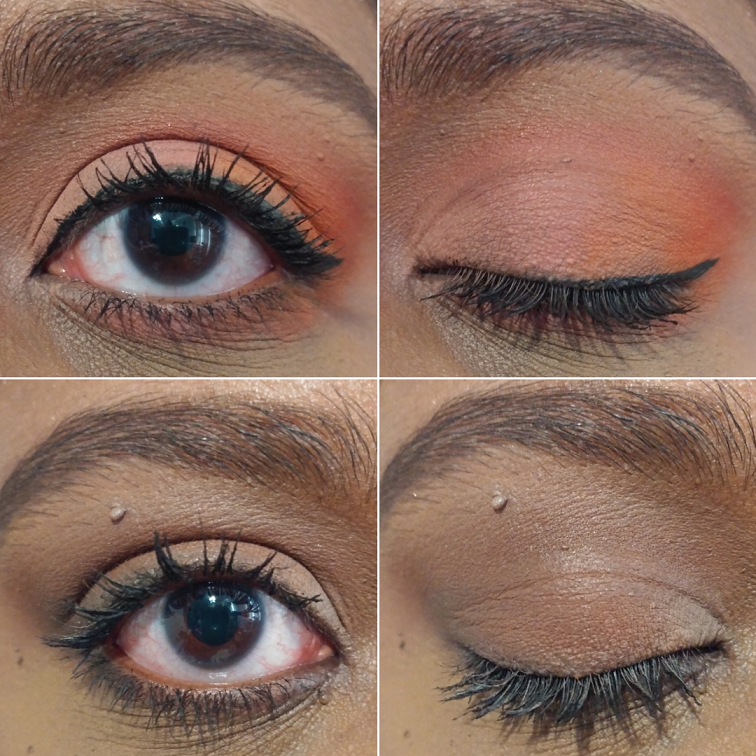
The full size Caramel Nudes palette reminds me of the Anastasia Beverly Hills Soft Glam palette. I didn’t see it available in-store, but the mini was there, which I thought was perfect to try out the quality of Douglas shadows without making a big price commitment. The eyeshadows swatched evenly on my arm and clearly looks pigmented on those with a lighter skin tone. I find the shadows to be on the thin side and I found myself craving a little more impact from the shimmers. The mattes blended nicely and were opaque with a satisfactory amount of pigmentation. I was also glad that the cream shade did not look ashy like some lighter shades can appear on darker skin. This palette lacks a color that can add depth for me if used on its own. This is more of a one and done type of palette. I did not use the tiny dual ended brush it came with, which is a miniature version of the brush that’s in the full-size palette. Overall, the quality is decent and I could see myself actually using this palette every so often if I’m in the mood for a soft look.


Douglas Cheek Me Up Cream-Like Powder Blushes in 02 Rosa Carolina and 07 Hollyhocks
I chose these blushes with the help of the staff at Douglas. They were very friendly and polite. Even though my boyfriend was there to translate, they didn’t solely rely on him for help and tried to speak as much English to me as possible. I also appreciated the fact that they didn’t try to sell me anything that clearly would not work for my skin tone, just to make a sale, as has happened to me in the past at other retail shops in the US. They were upfront about which lines they carried that had options for my skin tone. The two shades they picked for me were the ones I would have chosen for myself, and as a bonus they were heavily discounted, so even though they were similar shades, I decided to just get them both.


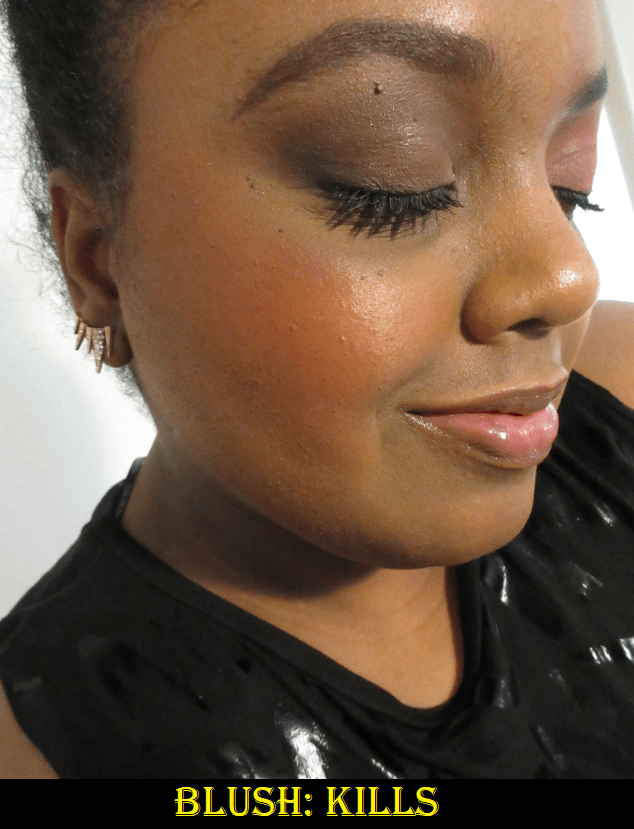
I used Hollyhocks quite a bit on the trip and figured it would be my preferred shade because I like brownish-pink type of blushes that look more natural on my cheeks. However, I still like the bright flush Rosa Carolina gives to my cheeks and how just two dips with my brush gives me easy color payoff. As I started to get darker, I began to favor Rosa Carolina more because it was easier to see on my skin, though they both show well on me and are easy to blend. They’re decent blushes that get the job done, and at 4 euros each, they’re some of the least expensive blushes I own. I have so many wonderful blushes though, that as nice as they are, they’d still rank in the lower middle of my collection.

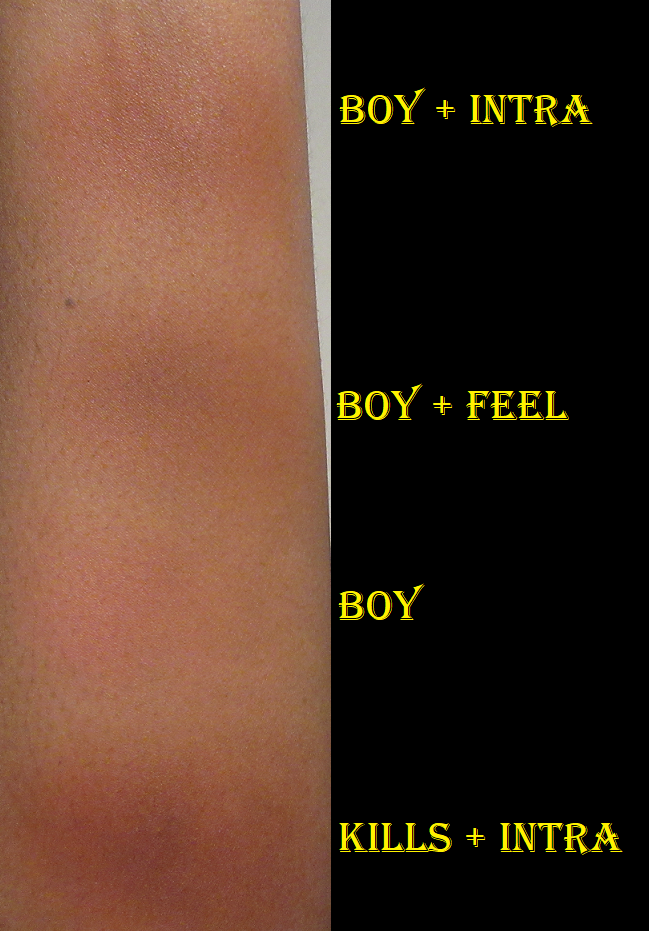
Shoutout to my boyfriend for being my light arm model! Not that he volunteered. I swatched shades on him while he played World of Warcraft, haha.
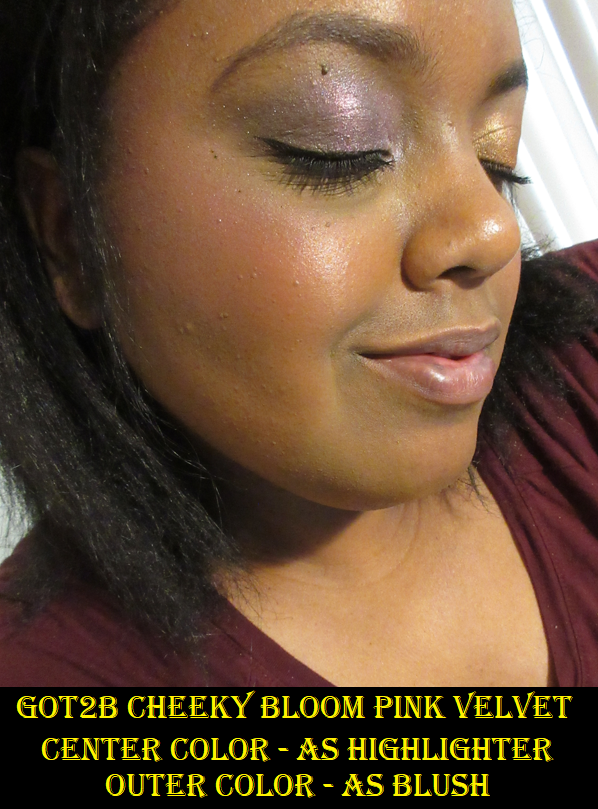
Got2b Cheeky Bloom Blush Powder in Pink Velvet
The inner pink circle is a slightly shimmery pale pink that I can use as a highlighter/blush topper. The outer bright pink ring of blush is what I try to pick up with my brush to use all over the cheeks. I like how soft the powder is and that there isn’t much kickup in the pan, but it still feels and smells powdery when I apply it to my cheeks. It’s definitely lower quality than I’m used to, which is a shame since it was 8 euros, but it’s not terrible. And because it has slightly more sheen than the matte Douglas blushes, it’s more flattering on my dry skin. It still looks nice on my cheeks, lasts as long as I need it to, is as lightweight as it’s described on the packaging, and contains nourishing ingredients like Macadamia Oil and Vitamin E, though I don’t know in what amounts. I’m still intrigued by other products from the brand, but for now my curiosity is quenched.
That’s all for today! I appreciate so much anyone who has taken the time to stop by and read my posts. Thank you. I hope this has been helpful!
Also, I wrote nearly all of this post months ago, but I kept pushing the publish date back because of new exciting makeup I wanted to review as soon as possible. I’m actually going back to Germany in a few days and won’t return to the US until the end of January, but I’m not sure if I will even be back home until sometime in February. For now, I am still on track to continue with regularly scheduled weekly posts, but if at any point this changes, the next eventual post will be on a Monday.
– Lili ❤